

SaaS Setup Playbook | Launching Your HighLevel Agency (Step-by-Step) / part 1
Before you pitch or onboard a single client, you need a clean, fully configured white-label agency setup. This guide walks you through the exact steps to get your foundation right and start building predictable monthly income.
Disclosure: I am an independent entity from HighLevel. I am not an agent or employee of HighLevel and have no authority to make binding contracts or represent HighLevel. I receive referral payments from HighLevel, including through the links in this post. The opinions expressed here are my own and shall not be interpreted as representations, guarantees or statements made by HighLevel.
✅ 🚀 Get the SaaSPRENEUR Local Hero Playbook!
Launch your white-label SaaS business with a proven system.
Step-by-step setup. Built-in workflows. Real sales strategies.
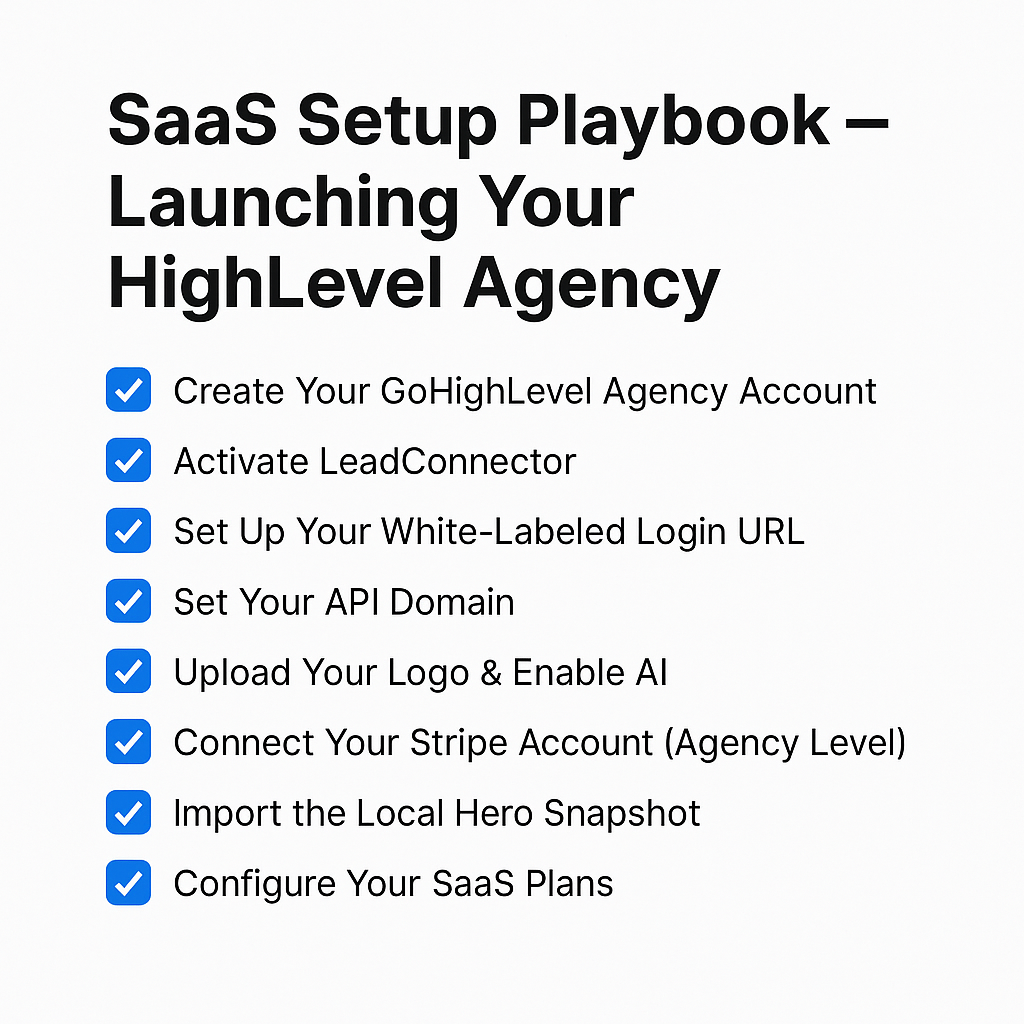
1. Create Your GoHighLevel Agency Account
If you haven’t already, start with a GHL agency subscription. This gives you access to sub-accounts, the SaaS configurator, white labeling, and the ability to resell services.
Tip: Choose the SaaS Pro plan if you want full automation and margin control.
2. Activate LeadConnector
Go to your agency dashboard → Settings → Twilio/LC Email Setup. Activate LeadConnector for:
- Automated SMS and email
- Local presence phone numbers
- Smart routing through GHL workflows
⚠️ Without this, your automations won't trigger properly.
3. Set Up Your White-Labeled Login URL
Brand your client login portal (e.g. portal.youragency.com) by:
- Setting up a CNAME in your domain registrar
- Pointing it to
app.gohighlevel.com - Assigning the URL in your Agency Settings
4. Set Your API Domain
For API use and branding consistency:
- Add a second CNAME (e.g.,
api.youragency.com) - Point it to
api.msgsndr.com - Assign this under the Developer/API section
5. Upload Your Logo & Enable AI
Add your agency’s logo and color scheme under Agency Settings > Company.
Then activate HighLevel’s built-in AI for workflows, messaging, and snapshot building.
🧠 The AI builder can speed up client onboarding by 3×.
6. Connect Your Stripe Account (Agency Level)
To handle client billing directly:
- Go to Settings > SaaS Configurator
- Connect your Stripe account
- Add your base subscription plans (Starter, Standard, Premium, etc.)
7. Import the Local Hero Snapshot
Download the Local Hero Playbook snapshot and upload it into your Agency Library.
This includes:
- Landing pages
- Email/SMS workflows
- Calendars
- Custom values
Use it as a launch template for each new client.
8. Configure Your SaaS Plans
Inside the SaaS Configurator, assign features and automations to each pricing tier:
- Number of users
- Email/SMS credits
- Premium features (AI, reporting, GMB chat, etc.)
- Pricing and trial options
Test each tier before going live.
✅ Final Checklist
| Task | Status |
|---|---|
| Agency account created | ✅ |
| LeadConnector activated | ✅ |
| White-label login set up | ✅ |
| API domain configured | ✅ |
| Logo uploaded + AI activated | ✅ |
| Stripe connected | ✅ |
| Local Hero snapshot imported | ✅ |
| SaaS plans configured | ✅ |
🔗 Next Step
Ready to build sub-accounts and launch client sites?
👉 Continue to part 2:
 Zoltan Juhasz
We cover this in more detail in the Voice AI workshop affiliate offer - part of our independent HighLevel guide collection.